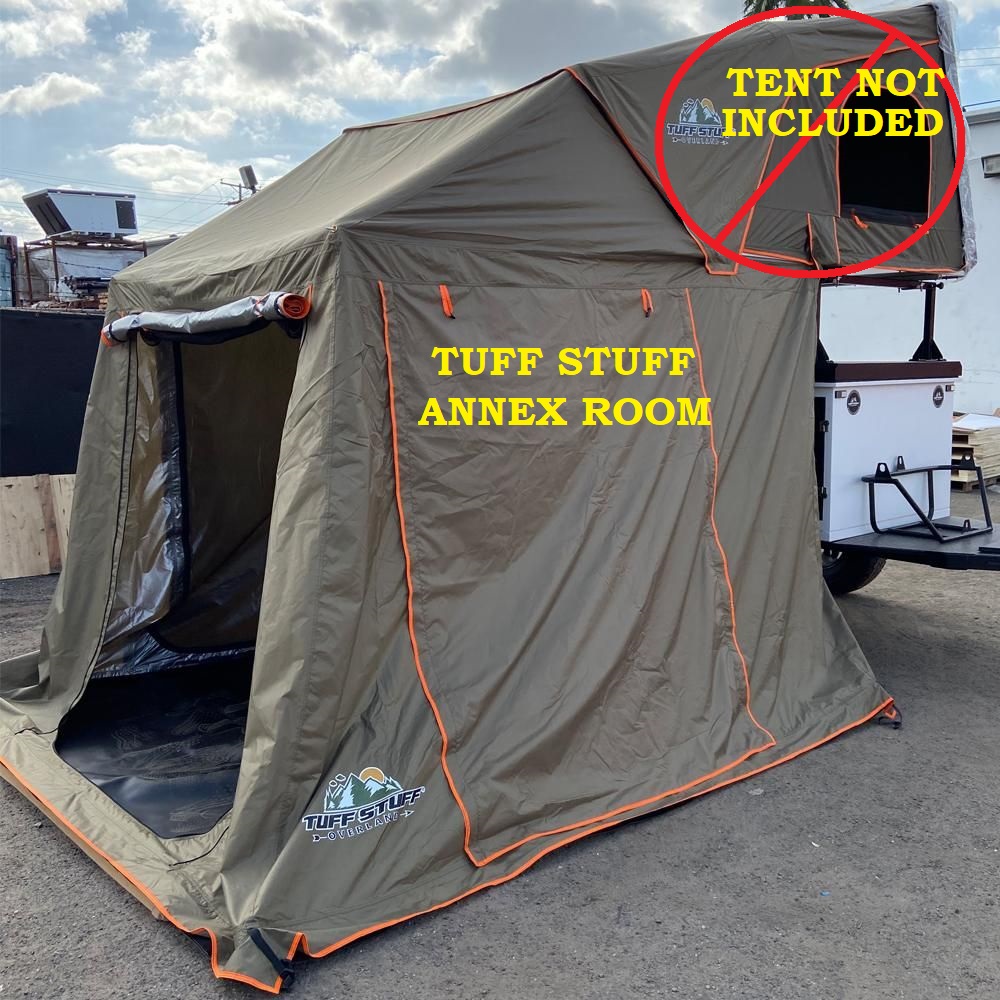
Description
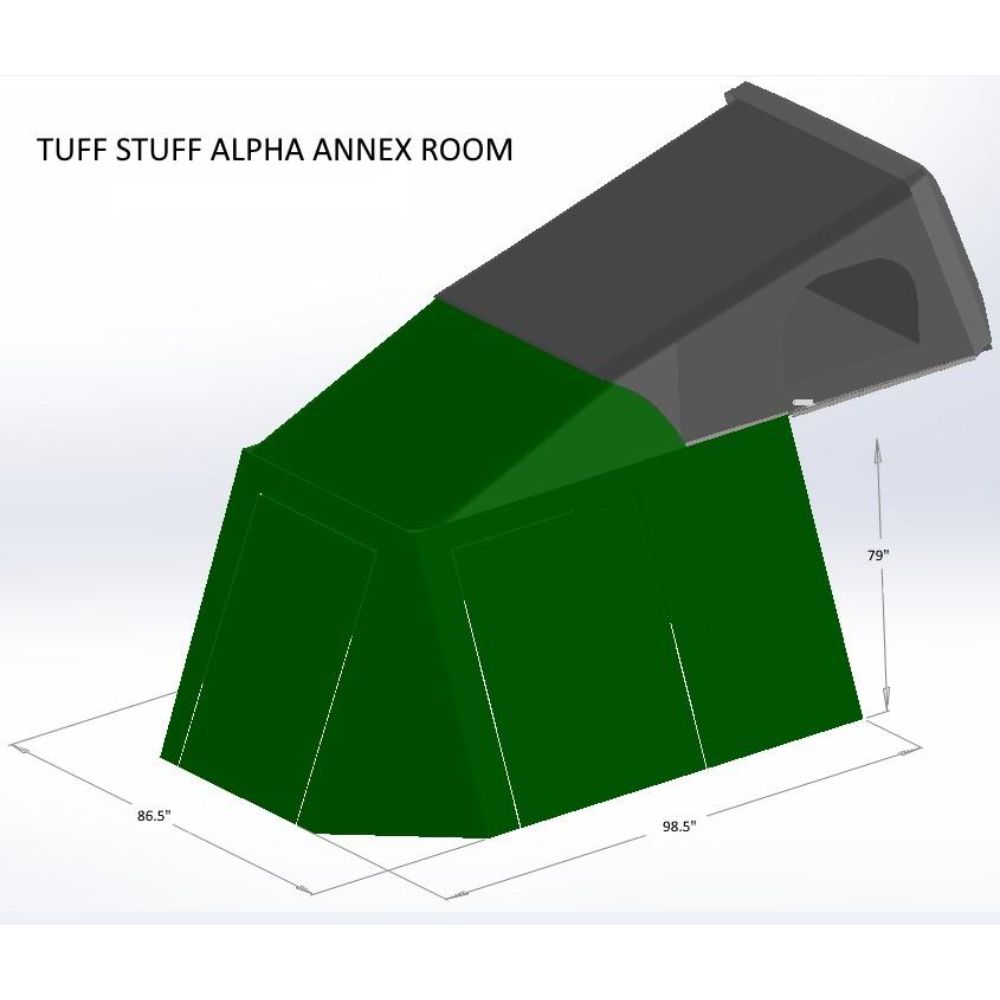
The Alpha Roof Top tent annex room is truly, the "Alpha" of all annex rooms, providing a huge space to keep your belongings, guests, kids or furry loved ones out of the elements while camping. With a heavy-duty 1000D PVC floor and solid panels to protect the zippers, your annex room will keep you and your gear sheltered and out of the elements. Our annex rooms' entry door is located on the front side of the annex room and includes a large zip out door at the rear wall to access your vehicle's passenger doors or bed while setting up at camp. NO-SEE-UM mesh screens have been added at all 3 windows including the entry door so you can still enjoy the beauty of the outdoors.
Guide ropes are included for increased strength in breezy conditions. And there is an aluminized internal coating to better retain heat.
This is a must-have addition to your Alpha Hard Shell Roof Top Tent!
*This is the annex room only, tent sold separately.
Instructions:
1. Spread out the floor until it is flat and locate the upper zipper.
2. Line up the zipper corner directly under the front left tent edge (w/the ladder retracted). The zipper corner should be on the left when facing the tent.
3. Take the annex room and find the "corded" (orange cords hang down to roll the back door up into) top back wall section of the tent. This top section is the area that will slip into the tent's base channel nearest your vehicle.
4. To get the back wall lined up correctly, take the annex room top w/the green color facing out, and slide the top of the room into the tent channel on the left side of the tent. Pull it towards the back, nearest your vehicle, and keep sliding it until you have all three sides of the tent run through the tent base channel. Again, the back wall is the wall w/the cords hanging down to hold the access door to your vehicle.
5. Once you have the annex room through the channels, zipper the annex room to the rainfly. It's a bit easier if you take out the tension rods first.
6. Now, starting on the back, left side, zip the annex room floor to the walls.
If windy:
1. Make sure your floor is evenly spread out. Use stakes to secure the floor at each corner.
2. Take the orange tension rods, extend, and place them vertically inside the front corners of the annex room.
3. Take the tie-down ropes and secure the tension rod loops from the outside and stake securely to the ground.
If raining:
1. Make sure your floor is evenly spread out. Use stakes to secure the floor at each corner.
2. Take the orange tension rods, extend, and place them horizontally inside the front corners of the annex room and extend them into the outer grommet holes at the base of the tent material next to the rainfly grommets.
Be sure to spread out the walls as tight as possible to ensure no moisture collects in low spots, causing pooling. Over-saturation will cause water to eventually penetrate the fabric after heavy rainfall over several hours. This annex room is NOT recommended for high winds or heavy rains.